Saturday, April 30, 2011

Building Garden Infrastructure


The frame comes first

I knew when I bought my house that I couldn’t garden the way I wanted to until the infrastructure was complete – that was the most difficult part.  I wanted to build supports for my plants that would be as permanent as possible, without costing a lot of money, and requiring a huge effort on my part. 

Googling DIY Websites

There are a lot of websites out there showing you how to build stuff in your yard.  None of them had exactly what I wanted, but I was able to gather a lot of info and ideas.

I knew I needed:
  • Support posts at the ends of the raspberry and marionberry rows
  • A grape arbor
  • A bean trellis

Things I knew about posts:

  • You can’t use pressure treated lumber in a garden, because of the chemicals leaching out of the wood into the soil

  • Even Cedar or Redwood posts anchored in concrete rot after awhile – at some point they would need replaced, and who wants to dig up the concrete the post was anchored in?

  • Metals posts would be more permanent, but just are not organic – not the vibe I wanted for the garden.

Then I had an Aha! Moment..

It all came about when I was trying to figure out how to hide the old metal posts from the chain link fence I had taken down that separated the front yard from the back yard. I found by arranging cedar 2x4’s around the post, and screwing them together with decking screws, I could cover the post and it would fit better in my garden.  Two posts I used to anchor one of my raised beds; the other post I was going to use as part of my grape arbor, but it just wasn’t in the right place, so now it is just there, and I will use it for holding a hanging planter or something.
First two fence posts covered 


I realized as I was covering those posts that I could do the same thing for the support posts and grape arbor.  So I had my son-in-law use the post hold digger and dig me some 24-30” holes.  I then put in a bit of gravel, put in a 6’ fence post ( the skinny ones), poured in some dry cement mix, poured in the water, and as it was setting up, I used a post level to make sure it was straight in all directions.  I let the concrete set up 24 hours, then clad the posts with cedar 2x4’s.  Yeah, support posts!

I put some short pieces of 2x4 on the posts by the berries and put eye hooks in the ends – these hold the hardware that allows me to tighten the wire supports.
End of first row of berries

One of the raspberry support posts is home to my mason bees, who have hatched out now and are busy pollinating everything blooming.
  Mason Bee home

I wanted to cover the tops of the posts before winter set in but didn’t get around to it.  If you live somewhere where it freezes a lot in the winter, you need to cover the top. Otherwise water can build up in the pipe and freeze and expand.  My plan for the posts is to put solar powered landscape lights on top.  I can only afford one a month, so will be adding them slowly.  But you could put birdhouses, (cute, but I don’t really want to attract birds to the berries, so won’t be doing that), or whirligigs.  Or just cap them off with a cedar fence post top.  The 5x5 cedar post tops are just a little big, but I figure I can shim them out, put some sealant in the cap, and then put some cedar trim around the edges if I want them to look less rustic.

I strung wire and put in hardware to tighten the wire for the grapes also.


I probably spent about the same amount on the 2x4’s and metal fence post that I would have on a cedar 4 x 4 – but where I will save money is later on – when the wood starts to deteriorate and I have to replace them.  I will just unscrew the 2x4, slap in a new one, screw it in, and I am good to go.  I don’t have to dig up the old concrete footing or deal with any of that mess. 

The grape arbor before ( when I bought the house)

Grape Arbor Construction
Side view
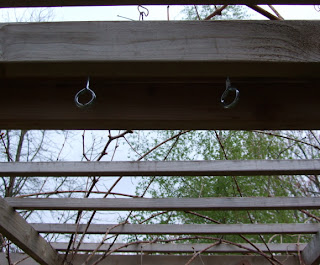
Top View ( with two eye bolts for my granddaughters swing)
Support detail
Completed Arbor
Misc Supports

I also needed support for cucumbers and tall peas, so attached a 2 x 4 frame to a raised bed, and used a poly trellis to stabilize it. Probably should add some corner supports like I did for the bean house, and if it ever stops raining this spring, I will!

Pea Supports
Summer 2010 - cucumbers


More on how I supported the beans later  – It has been raining so much here that I haven’t had a chance to go out with the camera and get pictures of the stage I am in now on “The Bean House”.


"I have never understood why “hard work” is supposed to be pitiable. True, some work is soul destroying when it is done against the grain, but when it is part of “making” how can you grudge it? You get tired, of course, but the struggle, the challenge, the feeling of being extended as you never thought you could be is fulfilling and deeply, deeply satisfying."             (Rumer Godden)

Saturday, April 23, 2011

My Favorite Rabbit


Time for a good fairy tale…
I have two favorite stories that I’ve read to my children over and over again.  They were, “The Emperor’s New Clothes”, by Hans Christian Anderson and, “The Velveteen Rabbit”, by Margery Williams.  Reading “The Velveteen Rabbit” when I was a little girl was life changing, so I made sure I read it to my children when they were young.  If you are not familiar with the story, it is about a stuffed rabbit that was snubbed by the other toys because he wasn’t mechanical, or made out of special materials.  Kind of how I felt in the 1960’s because I didn’t have blonde hair, blue eyes, and was a little pudgy.   

The question that haunted the Velveteen Rabbit was, what did it mean to be real?  His friend the skin horse said it took a long time, and that is why it doesn’t happen to those that break easily, or have sharp edges, or who have to be carefully kept. By the time you are real, you have lost your hair, your joints don’t work right, and you are kind of shabby.  (Hmm, except for the hair part, that pretty much describes me now, so I guess I am finally real.) The skin horse said you became real because you were loved so much.   Towards the end of the story, the Velveteen Rabbit is in pretty bad shape, doesn’t look like much, and his nanny and parents want him to have another toy, but the little boy won’t give him up, because to him he is real.  You’ll have to read the story to find out what happens at the very end.

Do you think you are real?
I suppose it is a similar theme to Pinocchio, the quest to be real.  We see similar themes in science fiction; Data’s journey to become more human was what many people liked about “Star Trek, The Next Generation”.  I value this story because it is the antithesis of our society.  Advertising and peers tell us that we can’t have gray hair, can’t be overweight, have to be a certain skin color – all to be loved, get ahead in life, look pretty… you get the idea.  At the time I first read this book, I was in first or second grade.  I had an older sister who was the 1960’s ideal beauty; blond hair that flipped perfectly, blue eyes, petite with a little turned up nose.  My mom used to introduce us as the beauty and the brains.  I had mousy brown hair that wouldn’t behave, so Mom cut it short and the other kids made fun of me.  When I read this book, I thought it didn’t matter what I looked like, as long as I was real.  So I started a lifelong quest on what it was to be real.

What would it be like to always tell the truth?
The Emperor's New Clothes (Kejserens nye Klæder) was written by one of my favorite authors and fellow-Dane, Hans Christian Anderson.  It is the story of two con-artists that convince the emperor that they can create clothes out of magic material, which are invisible to those who are either unfit for their job or hopelessly stupid.  And of course no one, including the Emperor, would admit to not being able to see the clothes, because they wouldn’t want anyone to think they were unfit or stupid.  It took a child to reveal their scam, crying out, “but he isn’t wearing anything”!  There is a story that Anderson recalled that as a boy, standing in a crowd with his mother waiting to see King Frederick VI, he cried out, “He’s just a man!”  Perhaps this was why he used that ending to the tale. 

How much do we stress and struggle in life because of what we have been indoctrinated into accepting as the status quo?  The challenge is to strip away all those layers and discover who we are, what do we really want to do, and what mind set is keeping us from doing it?  Thoreau wrote in Walden, “I would rather sit on a pumpkin and have it all to myself than be crowded on a velvet cushion”. 

My thoughts and actions have sometimes isolated me from the crowd, but when I look at what the crowd is doing, the fashions they follow, the things they want, I am okay with that; as long as what I am doing is striving to be real.  Find a quiet place, quiet your mind, center yourself, and just listen.  Watch the grass grow, a bumblebee pollinating a flower, snow or rain falling against the window, the wind moving the tops of trees.  You will find a great release in silencing your mind and just observing nature for awhile.  And then perhaps you can answer the question, what really matters?


Here is the version I recommend of Hans Christian Andersen’s Fairy tales:
These are the original versions, not the ones that have been toned down for cartoons and movies, I don’t think there are any pictures – this book is meant to be read by an adult to children.  Good reading for adults also, for all those who missed these stories when growing up.

(One of my coworkers had actually never heard of Hans Christian Anderson, any of his stories, Aesop’s fables, none of the myths and stories I grew up with.  What are they teaching kids today?)


Robin

Wednesday, April 20, 2011

Protecting your early garden plantings (or, how I beat Mother Nature)

In the Northwest, there are about 4-5 gorgeous days in February where the temps get up to around 50 degrees, the sun shines, and all gardeners get the itch to plant something - seduced by the promise of spring.  I succumb to this temptation every year, knowing that after the initial sunshine and warm temperatures, we will sink back into the 35 - 45 degree/ raining constantly for three months mode.

How to beat Mother Nature
Last year I decided to beat Mother Nature by covering my plants until the middle/end of June.  It was the first year I put in strawberries and I knew I needed to protect them.  It ended up being a horrid year for tomatoes, with cold, windy weather until the end of June that killed many tomato plants, but mine were all snug and warm in their covered raised bed.

Results of Online Research
I did a lot of research into materials and ways to cover your plants, and found for me the least expensive, most durable materials for the job. I started out by buying garden clips from Nichols Garden Nursery in Albany, Oregon (see link to left of posting).  Nichols is on of those dream suppliers - even though they are not far away, I order by mail because going there is too much temptation!.  They sell garden clips in two sizes; I purchased the one for using 1/2" plastic poly pipe.  Instructions are in the package.  I initially bought two packages of 30 clips - not cheap, but I expected to use them for years and years to come.  I also bought two different weights of row cover material.  But after doing additional research this year, the best buy for row cover I could find is from Gardener's Supply Co ( see links).  This spring I ordered from them a pkg of medium weight row cover, 6' by 50', for $18.95.  this is the best deal from any online store I could find.  I found less expensive at a wholesale place for greenhouse supplies, but the shipping was too expensive, making Gardeners the best deal.

Strawberries in Raised Beds ready for row cover

The cost of installing row cover
For covering raised beds, I started with some 36" rebar from the lumber yard - about $1.80 each.  That turned out to be 8 for each 6' bed.  I bought a 50' roll of black plastic poly pipe - 1/2".  I don't remember exactly how much it was, but it wasn't that much - probably around $9 -$11.  This is the same pipe that you use for drip irrigation, so it stands up to the UV rays better than PVC pipe ( and less expensive). I pounded in the rebar, cut the poly pipe to the size I wanted to make a nice arch, and pushed the ends down over the rebar.  You can't see it in the pic above, but in the front where I get so much wind, I also used plumbing clips to anchor the pipe to the box.  a pkg that did most of my boxes in front cost me a few dollars.

Last fall I cut off a lot of the runners from the plants above and planted them in a new box, and then covered them with a foot of loose straw for the winter.  when I took the straw off in February, I put the row cover back on.  You can see the advantage - after almost 9 straight weeks of cold, rainy, windy weather, the berries are covered with blossoms and are really healthy!

Strawberry babies from fall 2010 - blooming in early April 2011

A Promise Kept - Early Peas
I promised myself this year that I would plant peas in February.  But I was smart and covered them up!  Two days after I planted peas, chard and spinach, the forecast was for 18 degrees!  Ack!  And then it started to rain - we broke records this year with rain - out of 31 days in March, it rained for 29 or 30, lost count.  And it rained in February and April, so we have had almost two months straight of rain.  Fellow gardeners at work have watched the peas they planted at the same time flood, and never germinate.  Here are my peas:

Tall Telephone Peas and Oregon Sugar Pod II
still under cover of course.  the rows of spinach and chard I planted didn't really make it - I had two spinach plants that made it through the cold weather in March.  That's ok, I decided to start some seeds inside this spring, and just planted the broccoli, spinach and chard outside under cover last night.

Sewing Room turned Plant Nursery

First Year for Asparagus
I am happiest about my new asparagus bed.  We love asparagus!  Even my granddaughter loves the tender shoots.  I prepared a bed for them in late winter, but made sure after I planted them that they were covered:
I kept peeking to see if anything was coming up, and was almost despairing after all the cold weather we had, when a few days ago I saw the first spears coming up!
Of course these won't get picked - these will turn into those lovely fronds, and then I will let them go for about two years before we pick any - but that is what gardening is all about - planting for the future.

Advantages of Row Cover
The great thing about row cover is that it lets through 70 - 85% of the light, and some of the water, so I don't have to worry about watering, and the tender plants are protected during the torrential spring downpours -  I don't have to worry about hailstorms, thunder showers, etc smashing new tender plants, or the cold wet soil rotting my seeds.  When there is a little sun, it warms the soil in the raised bed quickly.  Temps under the row cover are 10-15 degrees above outside air temps.  That means that on a really warm day (60 degrees?), I open the ends in the morning so the plants don't get overheated and close them at night.  If you have problems with bugs, or birds, you can use the summer weight row cover to protect your crops. (Check out the links for both summer weight and regular weight row cover)

Tomatoes from late spring 2010 - ready for row cover
Tomatoes in August 2010 - huge, prolific, thanks to the row cover
I made taller hoops and put row cover on in the fall, and we had tomatoes almost until thanksgiving - plenty for us, and plenty to give away to neighbors.

Final thoughts - Protect your investment
I know that having a garden is partly about saving money on food. And that there is a cost involved in purchasing garden supplies like this.  But this is all about the infrastructure of your garden.  why invest in seedlings if you can't protect them?  I used all the row cover I bought last year, and the row clips, and bought more this year to cover the rest of my boxes.  It withstood 60 mph gusts, without tearing.  I plan on using this row cover and clips and poly pipe for years before having to replace them - they will extend my growing season and protect my investment in seeds and plants.  And, you don't have to have raised beds to cover your plants - instructions with the clips show you how to cover your beds with just the rebar and poly pipe.

Good luck beating Mother Nature!

Sunday, April 17, 2011

Making Raised Beds

Making raised beds

Last year at this time I was busy making raised beds for my garden – my first garden since moving to this property in October 2009, and my first real garden in fourteen years.  I grew up with traditional gardens; spade up or rototill the soil in the spring when it can be worked, plant in long narrow rows with wide paths, and spend the growing season fighting the weeds.  I grew up with that method but wasn’t happy with it.  With Fibromyalgia, I knew that the only way I could have a garden is if I didn’t have to get down on my hands and knees and bend over all the time.  For years I read about square foot gardening and raised bed gardening.  With this property, and at this time in my life, I knew it was time to put all I had read into practice.

How high to build the raised beds?
Most raised bed gardeners will tell you that only twelve inches of raised bed is needed – that may be true, but it wasn’t tall enough for me.  I knew it would take more height to get to the level of comfort I wanted – no bending and no getting down on my knees.  So I made the beds using cedar fence boards – for the berry canes I went two boards high – about 10 – 12 inches high.  But for the other beds, I went 3-4 boards, or 16-22” high.  (Six inch cedar fence boards are really about 5.5 inches wide).

Starting from scratch with an ordinary yard
Here is what the yard looked like before I started building the beds ( and after my daughter and son-in-law chainsawed down the hedge that was shading the whole back yard):

Chain link fence went to a good home, and I hid the fence posts
Here is the same view after I had the front yard beds built for the raspberries and was working on the back yard beds:
Metal fence posts are now clad with cedar for tomato supports

How I built the raised garden beds
These beds are 6' by 3' - all cedar, with a cedar 2 x 4 in each corner, and two 2x2's on each side.  I put them where they needed to be, dug a hole with a hand trowel in each corner, sunk the corner posts till the cedar boards hit the ground, leveled as best I could, then dug a hole inside where the 2x2's would go, pounded them in, screwed the boards to the posts, and then starting putting dirt in.  After the first couple of boxes, we found it was easier to unscrew the boards from the narrow ends and wheelbarrow in the dirt until we ran out of room, screw back on the boards and finish filling up.  I used deck screws (for longevity) in all the boxes.   I know the cedar will start to deteriorate after awhile, but this way, I can just unscrew the boards that need replaced and put new ones on.
Set corners in ground, level, add dirt, then screw on ends

Front yard:Raspberries, Currants, Marionberries, Strawberries, Herbs, Apple tree
Choosing what to put where
This shows our dirt we had delivered, the raspberry/currant/marionberry beds in the background, then the strawberry bed in the middle front there, my rosemary and apple tree (I grew from a seed) to the right, and the beds to the left would become peas, carrots and tomatoes.  Notice the metal posts here and there -  more on those in another blog.

Pie Pumpkins take over the front ( and were great in muffins, bread and pies)
Setting supports for the Raspberry Beds
Another view of the raspberry beds, and the pic above this one is looking at the front beds about September - when the two pumpkin plants I put in the corner of the rosemary box were taking over the aisle space.

Two months later - so much abundance!
Raspberries after they started producing.  I think my granddaughter ate most of what was produced.  We had raspberries up till early November.

 This shows the tomato bed in detail (I planted them way too close together, and had to move the marigolds out because they were overshadowed) - this was right after I planted them and before I put on the row cover - which saved my tomatoes from the torrential downpours we had last year and gave me a great harvest:
We were also inundated with cucumbers, salad mix (mesclun) and radishes

Advantages of Raised Bed Gardening
The reward for all this work came for me last summer when I could take either my little stool or a resin chair, and sit and do all my planting, weeding, harvesting sitting down or standing.  No bending over and no getting on my knees.  Sure, I had to do that while I was making the beds, but I was building for the future.  Already, I know that I can’t do now what I did then, so am glad I did all the building a year ago.

My other reason for finally doing raised beds is that I have a lot of experience in amending soil – too much experience.  My parents had a property with a lot of clay and it took almost ten years, tons of rotted manure, leaves and grass clippings before the soil was really fit to produce anything.  My first house in southeast Portland used to be part of the Columbia river bed – I think we took about four pickup loads of rocks to the landfill from the garden space.  And it was too sandy to really hold water – it also needed a lot of compost.  Every time I moved I found that I had to amend the soil in order to garden, and that takes time and a lot of backbreaking work.  I didn’t have the time or the energy with this garden.
The cost of purchasing soil mix
In a raised bed, you can use your own soil if it is good, but if it isn’t you can get good soil, or compost, and mix it in as you fill up the beds.  I was fortunate to have a supplier of a topsoil/compost mix less than a quarter mile away ($25 a cubic yard for the mix). I had the choice of picking it up myself a half-cubic yard at a time ( all my little truck will hold) or having it delivered.  I chose to have it delivered, which cost me $20 – well worth the price for the wear and tear it saved on my truck (and on me!).  They could also blow it in, like they do barkdust, and I would have done that, but we had such a wet spring last year and the soil was so heavy, that they couldn’t do that.  So I just had it dumped in a spot near the garden and then my son-in-law did most of the shoveling and dumping the soil into the beds.

We did test the soil when we got it, and sprinkled on some lime and some other amendments, working it into the soil as it was shoveled into the beds.   I knew this was the right approach to take this spring when I went out in February to plant peas – there must be 7 – 10 worms per square foot!  They love this soil.  Soon, it will be full of earthworm castings, giving us even more nutrients.   Next post, I will share how we protected the beds from the horrid weather of 2010 and actually got a tomato crop when others were failing.  Also, will share what modifications I made this spring to improve on my designs.
How much does it cost to make a raised bed?
If you don't have the money to get the materials for raised beds, don't let that deter you - plan on planting something anyway!  But even if you get one bed done a month, in a year you will have the beds you need for the future.  Having a garden is all about planning for what you are going to be doing over the next 5- 7 years.  I paid about $1.65 for an 6' 2x4, $1.35 for a  6' 2x2, got a deal on the cedar fence planks - between 99 cents and $1.29 ( some were kind of bad but I could use at least 1/2 of the board).  I used 9 fence boards for each bed (3 high), so the cost per bed was roughly $13 - $14.  I looked for sales at lumber yards ( this time of spring is good for sales as they want last years stock gone) and spread the cost over a couple of months.  I had budgeted $50 a month for the garden when I moved in October 2009, so had some money for the initial outlay.

It is not too late to start building your raised beds!

Saturday, April 2, 2011

The Journey Begins

Desperate people, desperate times
The voice on the phone was desperate. “I paid my rent, but if I pay my electric bill, I will only have $25 left to feed my kids this week. What can I do?” Answering my phone while working in anti-poverty programs brought pleas like this every week. Fortunately, I was able to walk them through what they needed to do to get through their temporary crisis. No matter who you are or what your station in life, the potential for crisis, just like the potential for success, is always there. An economic downturn, loss of a job, an unexpected family illness; life has a way of surprising us every once in awhile and we can get caught up in situations we are not always prepared for.
During the last ten years, my job has allowed me to help many people through tough situations by showing them how to shop for and prepare food as economically as possible. I have also counseled on how to cut costs in other ways. I am able to do this because I have lived through experiences where I had to learn to do this.

Born in Oregon, I am still a child of the Midwest...
My parents were born in Iowa between 1927 and 1932. Living through the Great Depression affected them the rest of their lives and affected how they raised us children. World War II and the Cold War further changed how my parents lived their lives. I do not remember a year without a garden and my mom canning and preserving anything that they could grow or harvest locally. I never tasted store-bought canned beans or tomatoes until I was an adult – we always had home-canned vegetables. My parents lived in the city, and a third of our yard was taken up with a garden; our lives centered around the planting, growing and harvesting of food, which we stored in the basement bomb shelter. My father fished and kept our freezer stocked with salmon and trout, my mother made our clothes and we did more with less before it was popular to do so. I grew up in a household where everything was made from scratch. It was the perfect environment for someone who would be part of the 1970s 'Back-to-the-Land' movement.

Living on a Greek Island - age 19
In 1975 my husband and I, courtesy of the Air Force, were living in Northwestern Greece. This was not the Greece of American tourists. This was a Greece where people still gathered in curiosity around you when you came into their village, because they seldom saw Americans. There were no chain stores or supermarkets. There were a few stores that had more than one thing, but there were mostly specialty stores; the butcher, the vegetable vendor, the wine shop, a cheese shop to name a few. There were no boxed food mixes, no prepared foods unless you went to a taverna. Luckily, I had learned to cook from scratch when I was young. Early shows on TV like Graham Kerr’s “Galloping Gourmet” and Julia Child's shows had inspired me to experiment and be creative; I had no problem adapting to this new environment.


Living so close to the food source was a new experience for my husband. He was from Ohio and had never gardened, he didn’t really know what to do with food that was straight from the source. Going to the local markets, taking home chickens that had been walking around just a few hours before and getting produce direct from the growers were all a new experience for him. For me it was a return to what I had grown up with. We returned to the U.S., moved to Oregon and gardened in the city for awhile. Our subscriptions to “Organic Gardening” and “The Mother Earth News” were challenging us to take a more radical step and in 1979 we bought a 50-acre farm in West Virginia and went “back to the land”.

No, we were not Hippies... but my CB handle was "Mt Mama"
With Carla Emery’s “Old Fashioned Recipe Book” in hand, we settled on the farm with our six-month old little girl, fifty chickens and an old tractor. It was a lot harder than I thought it would be. Our only drinking water was a quarter mile up the road and we relied on a hand dug well next to the house for washing. You don't realize how many gallons of water a family consumes in a day until you have to haul it from the source. There was no phone lines up the valley we lived in so there was extreme isolation. I made everything from scratch; butter and cheese from whole milk picked up at the dairy, wheat was bought in bulk and ground in a hand mill for flour and I made bread almost every day. We lived on venison, chickens and squirrel, ( I drew the line at woodchucks). There are those reading this that might think this sounds idyllic, but there was a reason that women died at a young age a hundred years ago. While it is nice to know where your food comes from and what exactly goes into it, it isn’t really fun to work from 4 am to 11pm every day and fall exhausted into bed. Every day is a struggle to survive and you constantly think about food and how much can you put away for the winter. When you have harvested the corn for the winter chicken feed, but then rats get into it – that is discouraging, and kind of creepy as you lie at night listening to the gnawing.


Living off the land is no picnic and not to be attempted lightly. There is the joy of providing for your family for a year at a time, looking at your pantry and having a sense of accomplishment when you look at all your canned goods. There is also the fear when you have a cold spring and are running out of firewood and the snow has not melted yet; how do you keep the children warm? The main casualty of this experiment was my marriage. I headed back to Oregon with my children, back to civilization, telephones and clean running water.

Now a single-parent...
Living a single-parent lifestyle over the next 20 years continued to be a challenge emotionally and financially. I had to learn ways to keep food on the table, pay bills, clothe my children and provide decent shelter for them. There were bumps along the way; I had my electric service shut off a few times, we were homeless for a while and my kids didn’t often have new clothes. Through most of this time I was fortunate enough to be employed, although I faced many years without health benefits for myself or my children. 
 
As a family, we embodied the sentiment in Thoreau’s “Walden” to not undertake any enterprise which requires new clothes. Make do with what you have was something that I lived out for my children and hoped they would also embrace. (Somewhere along the way, in the early 1990's, I became a convinced Quaker). My kids all turned out healthy and well-adjusted despite the trials they had to face. They never wore name-brand clothing, for many years they only received one pair of shoes per year. We rarely went out to eat and pizza was a treat in our household but living in this way was the perfect preparation for the reality of living as an adult in our volatile economy.

What to do with all this experience?

I have been able to help desperate people calling into our office because I have been there – I have had the cut-off notice, the need to have a few dollars buy food for a week, been kicked out of my house and left with nowhere to live. It is an agony while you are going through it. You despair for yourself and your family. But you can get through it. Every experience you have, even though it seems horrific, does enrich your life and deepens your experience here. Joy will come again, later perhaps, and it will be the sweeter because you have overcome the present trials that you are going through.

There are people who will come to this blog because they are in crisis – if you comment on a posting I will try to get an answer to you as soon as possible – but realize I don't have all the answers. Just a lot of experience. I can tell you that the hardest thing to do is to change your mind – change what you want, change what you need. Your expectations for your life have to undergo changes most of the time. That is where I will challenge you the most. This blog supports my effort to finish the book I started a couple of years ago that is my guidebook to how to live simply, make choices that support that goal, manage your household efficiently and also touches on the philosophy behind these choices. And I will strive to make my postings a lot shorter then this first one! So welcome, Friends.  I hope you enjoy this journey.


Robin